Creating your Database from PayWindow
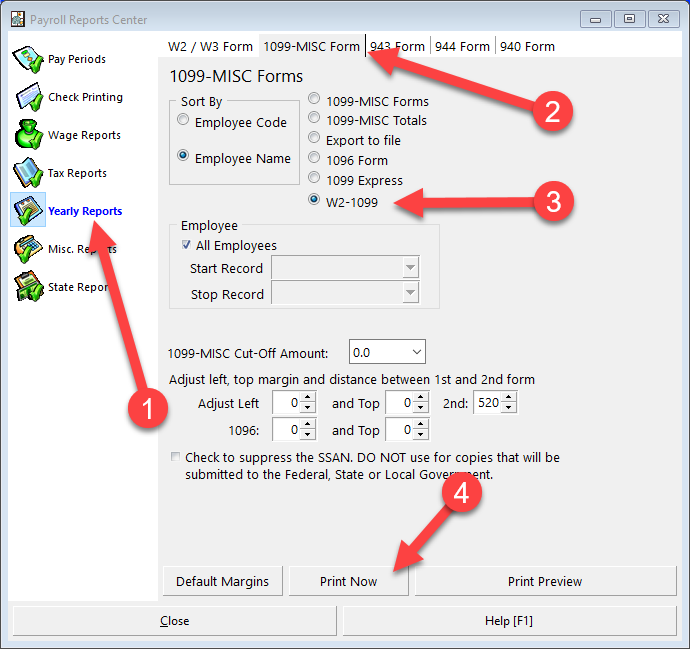
We will show you how to Export your data at the end of the year and then load W2-1099Form from PayWindow to import the data automatically. This is the Yearly Reports Window with the W2 Form printing and exporting page open. You will click the W2-1099 radio button under the W2 Type section. Then click the Print Now button.
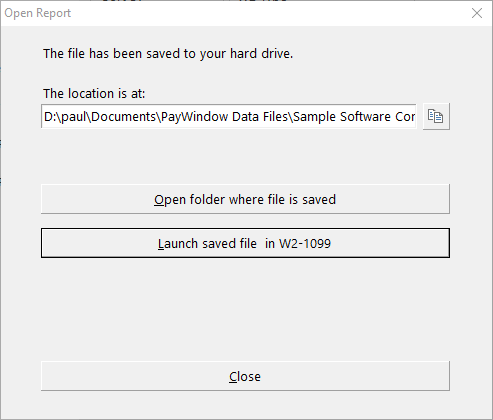
That will then open this Window showing you the folder that it saved the exported file and if you then click on the Launch saved file in W2-1099 it will launch W2-1099FormWindow so you can import.
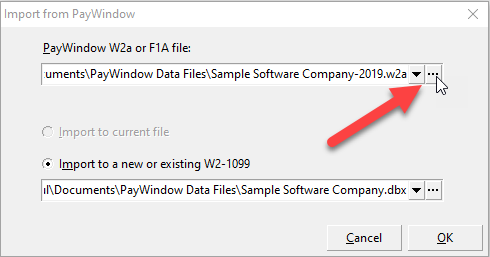
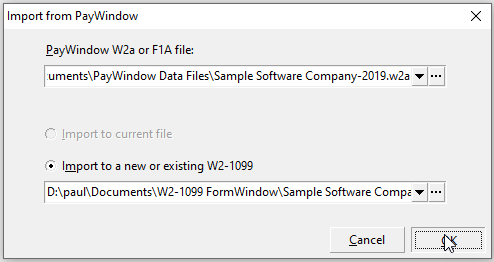
The next step is to import the data into W2-1099FormWindow. As you see below the Exported W2a file is shown selected as I already had selected it. You should click the small three dot button to insure that you have selected the proper file..
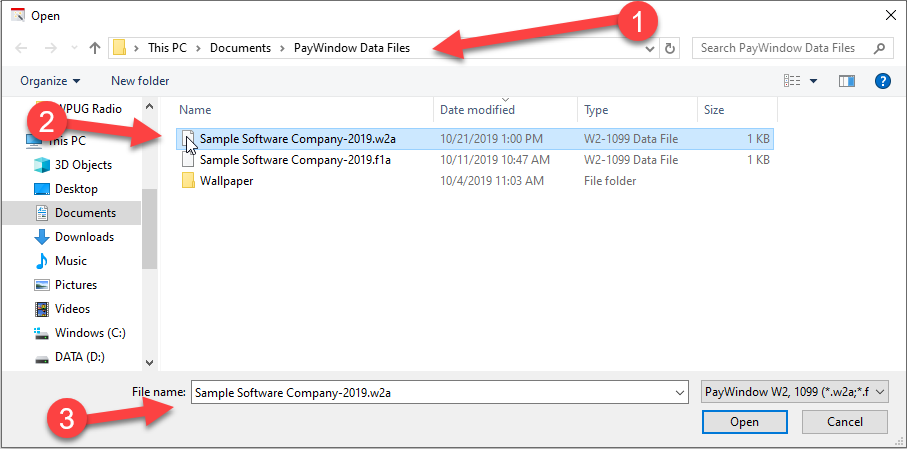
A few things to point out are that PayWindow Data files are normally in the Documents\PayWindow Data Files\ folder. I tem 1 seen below. The W2 Form import file has a file extension of ".w2a" as seen in item 2 below. You will also not that I have already exported a 1099 form payee file too which is immediately below the W2 Form file from item 2. Finally since I clicked on the ".w2a" form, it put that into the File name we are going to import which is item 3 below. You would then click Open to select that file.
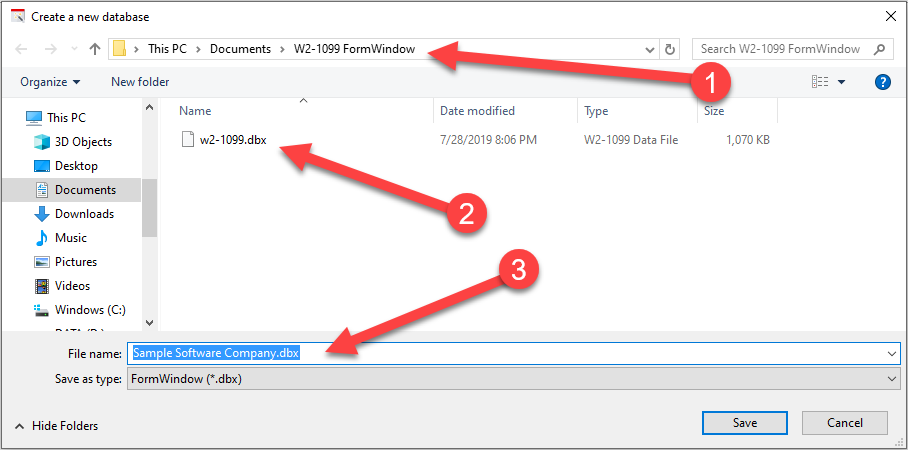
Next we want to verify that the imported data will be inserted into the proper folder too. We will click the three dots button at the bottom of the same Dialog Window.
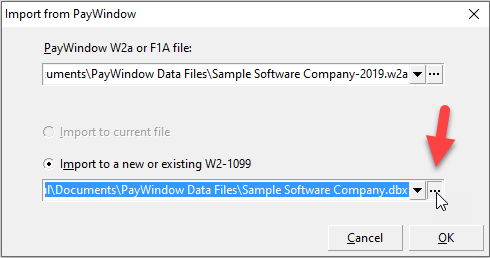
As you can see below, we opened up pointing to the default folder for the W2-1099FormWindow data files in item 1 below. You might also notice our example database w2-1099.dbx as well as item 2 below. I typed in the name of the database I want to use in item 3 below which is "Sample Software Company.dbx" in item 3 below. Then simply click Save.
Then simply click OK when back to this Dialog.
If everything when as planned, you will see the success message. Our Sample file has 4 W2 records that we exported.
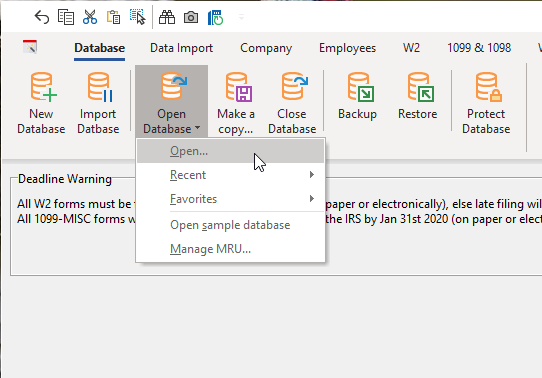
Since this is a new database, you can now click Open Database to open the new Company Database that you just created. Click Open Database and then Open.
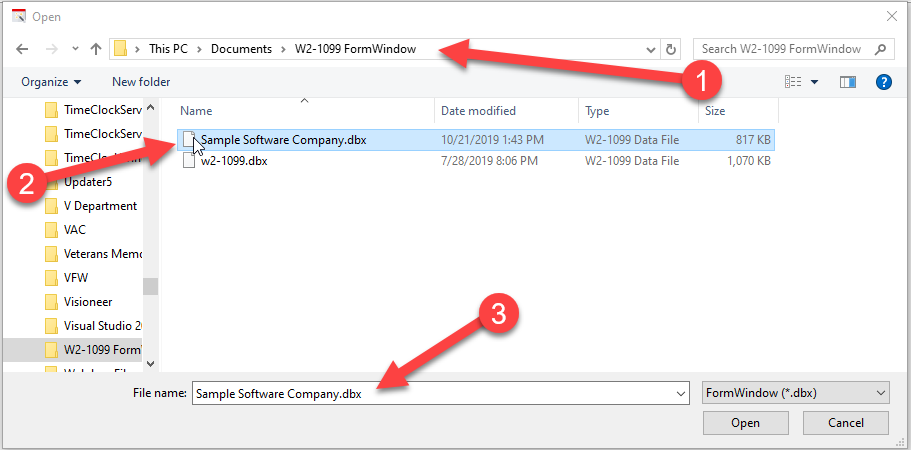
If you look below, we are in the Open Dialog for the default W2-1099FormWindow data files folder item 1 below. And we have selected the new file that we created "Sample Software Company.dbx" item 2 below and it is shown down in the File name to open item 3 below. Clicking Open will open the company in the W2-1099FormWindow program.
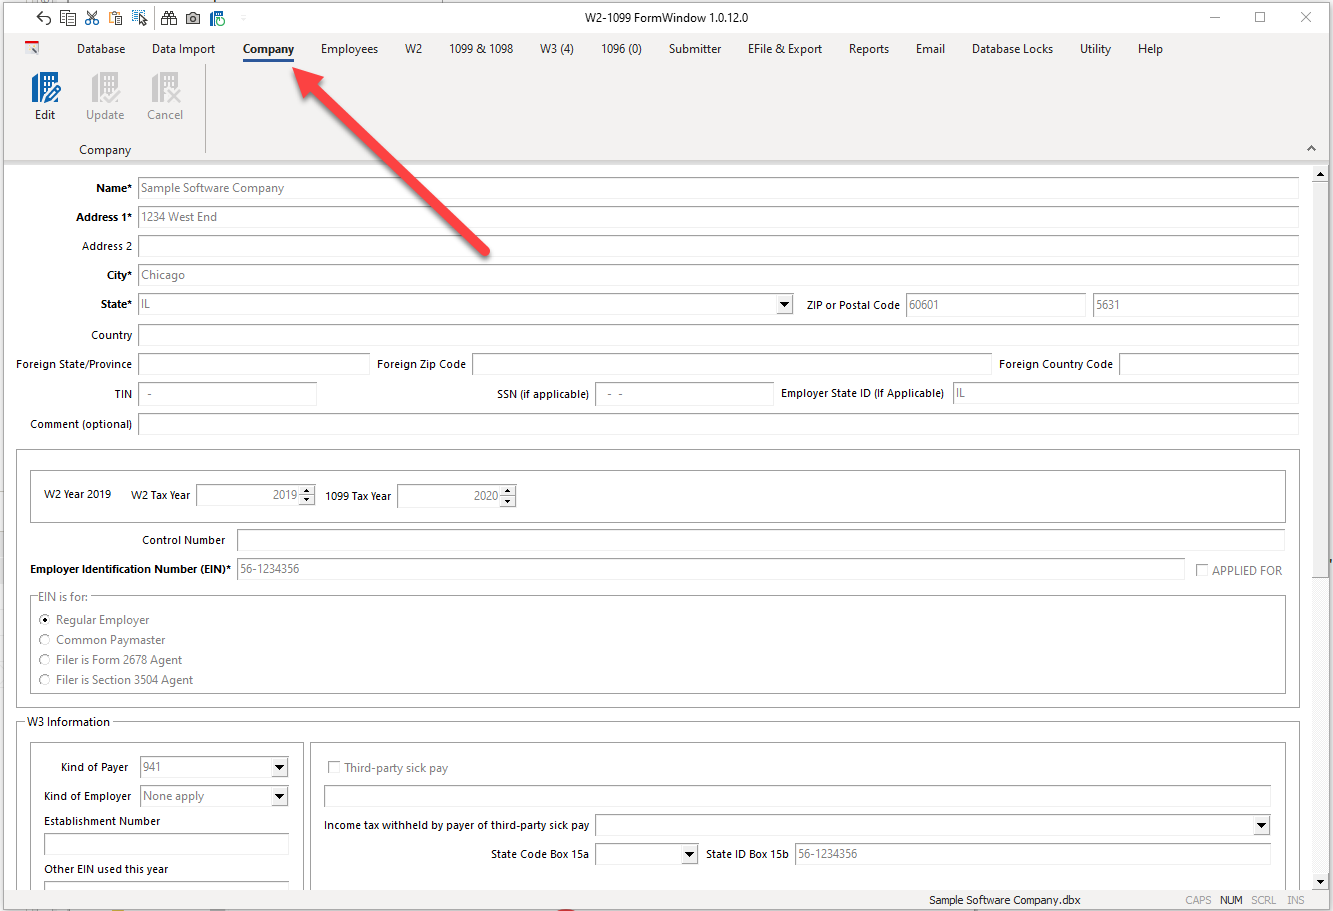
If you click on the Company Button, you can view the information imported as well as edit it too.
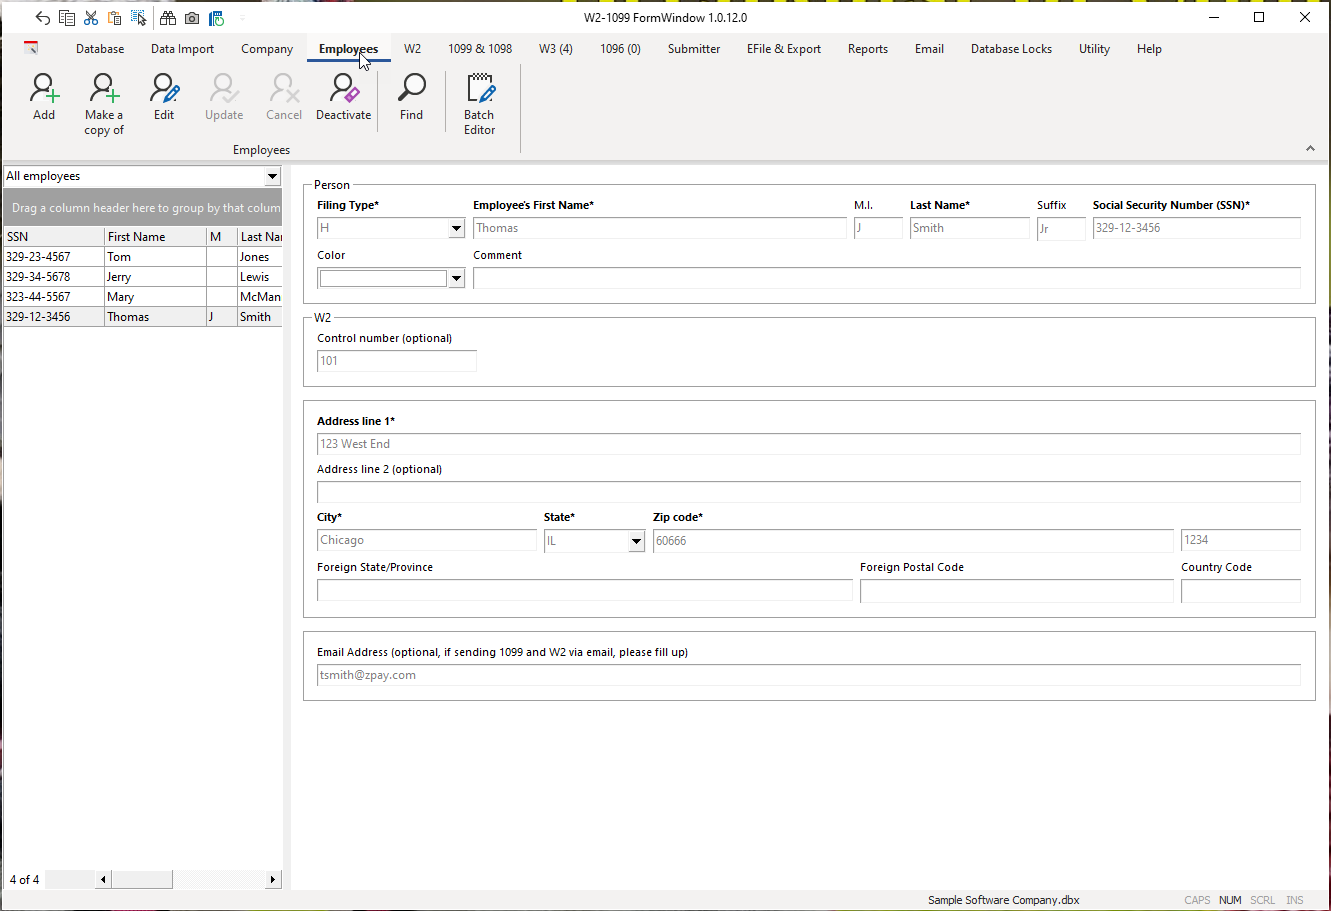
Clicking on Employees will open the Employees list and you can edit the information for each employee on this page too.
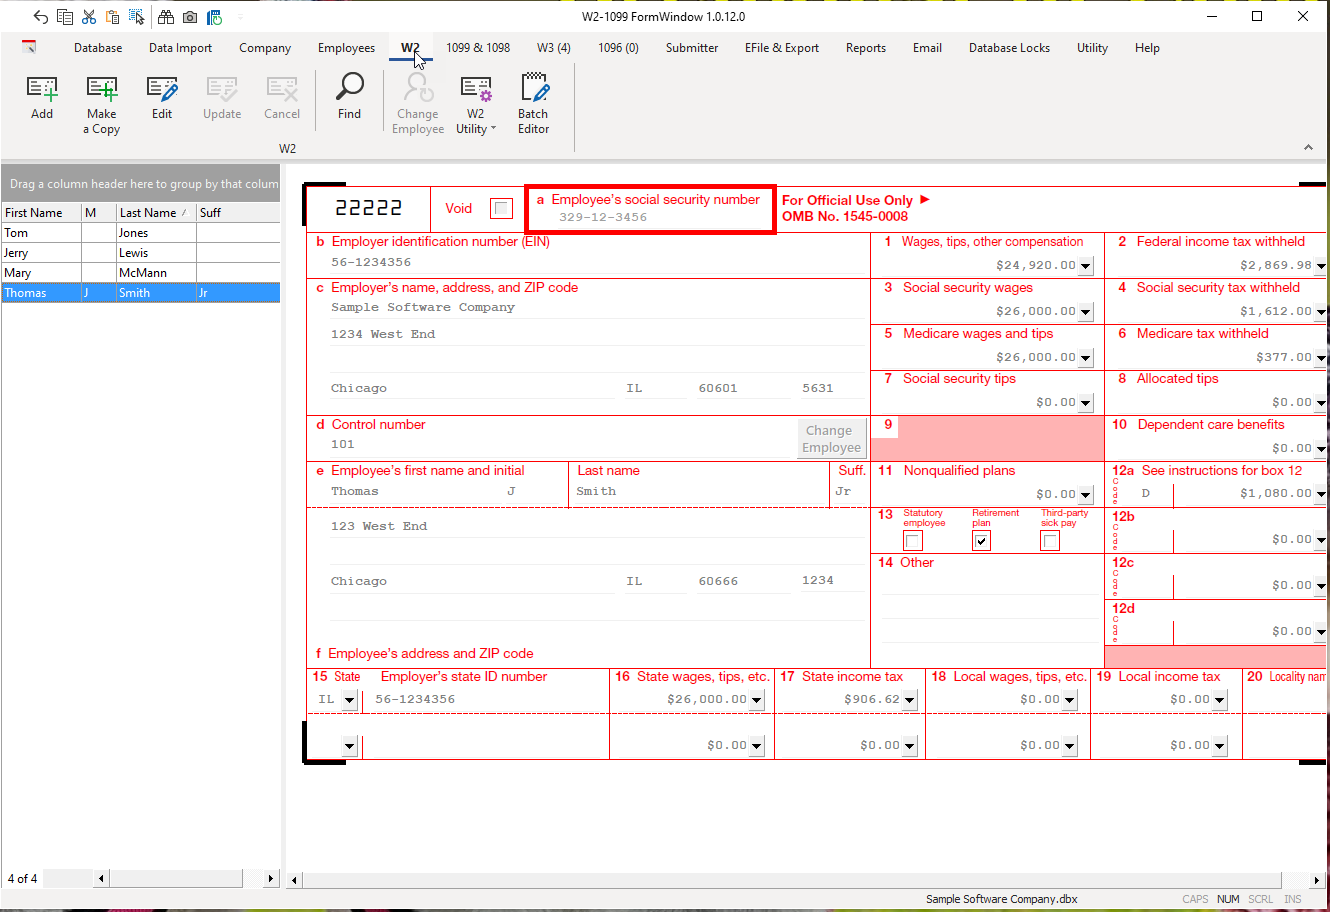
Clicking on W2 will allow you to view and edit the W2 Forms.
Importing the 1099 Payees and data from PayWindow
Above we showed you the 1099-MISC file exported from PayWindow. That was done just as this was for the W2's except it was under the 1099-MISC Tab (Item 2) of the Yearly Reports (Item 1) section of the Report Center. Select W2-1099 (Item 3) and click Print Now (Item 4) to export the ".f1a" file.
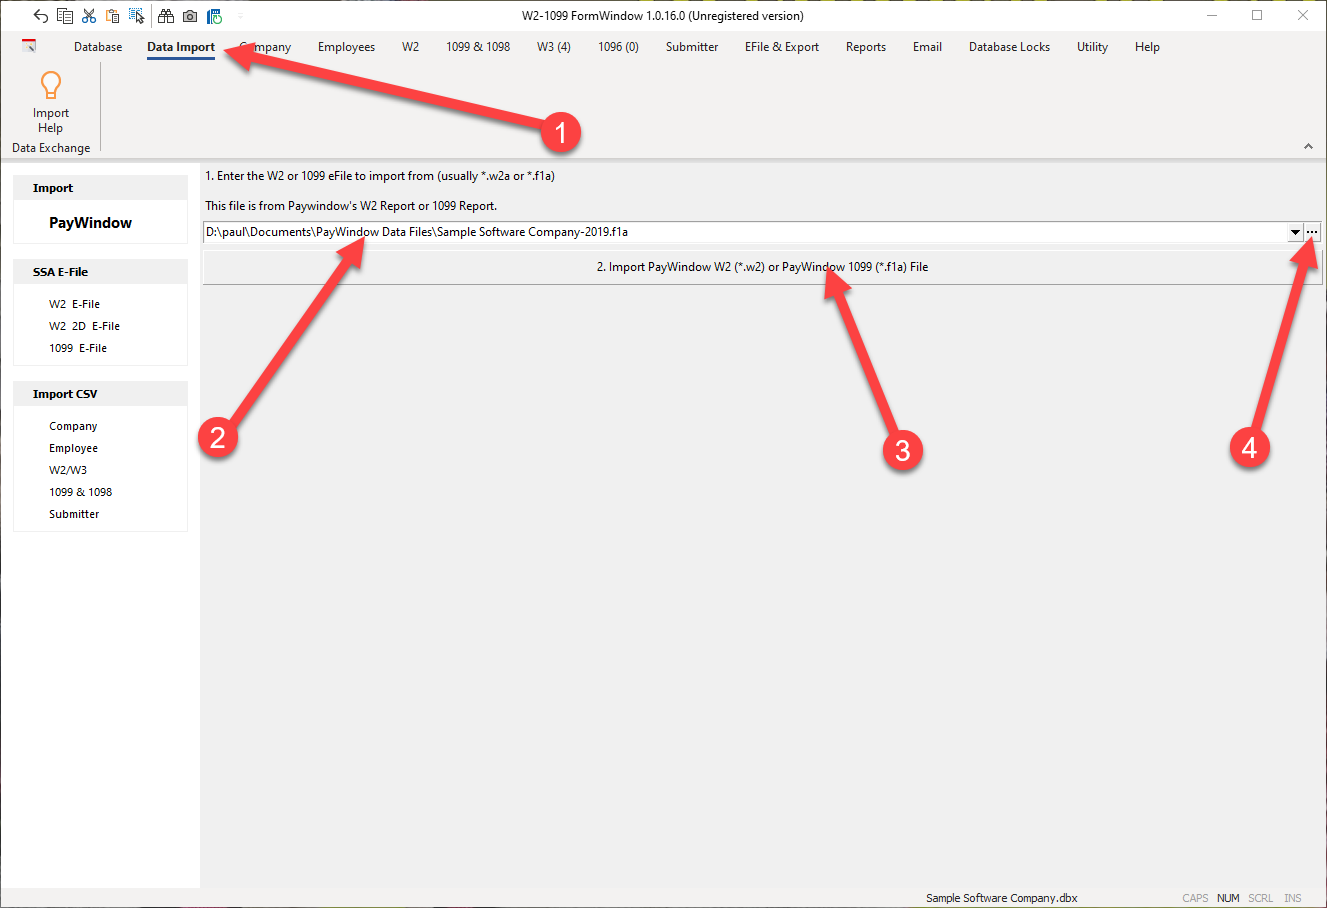
We are going to show you how to use the Import tool to import this file. We are already in W2-1099FormWindow and we have our database we created earlier open Click on Data Import (Item 1) which opens the Window you see below. Since it already knows your PayWindow folder, you see the 1099-MISC exported file in the PayWindow Data Files Folder (Item 2) below. If not, you can use the three dots button (Item 4) to find it. Since we have it selected, simply click the large button (Item 3) to import the selected export file into your company database.
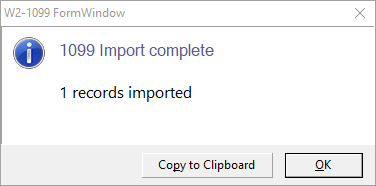
You should see the Success message like this:
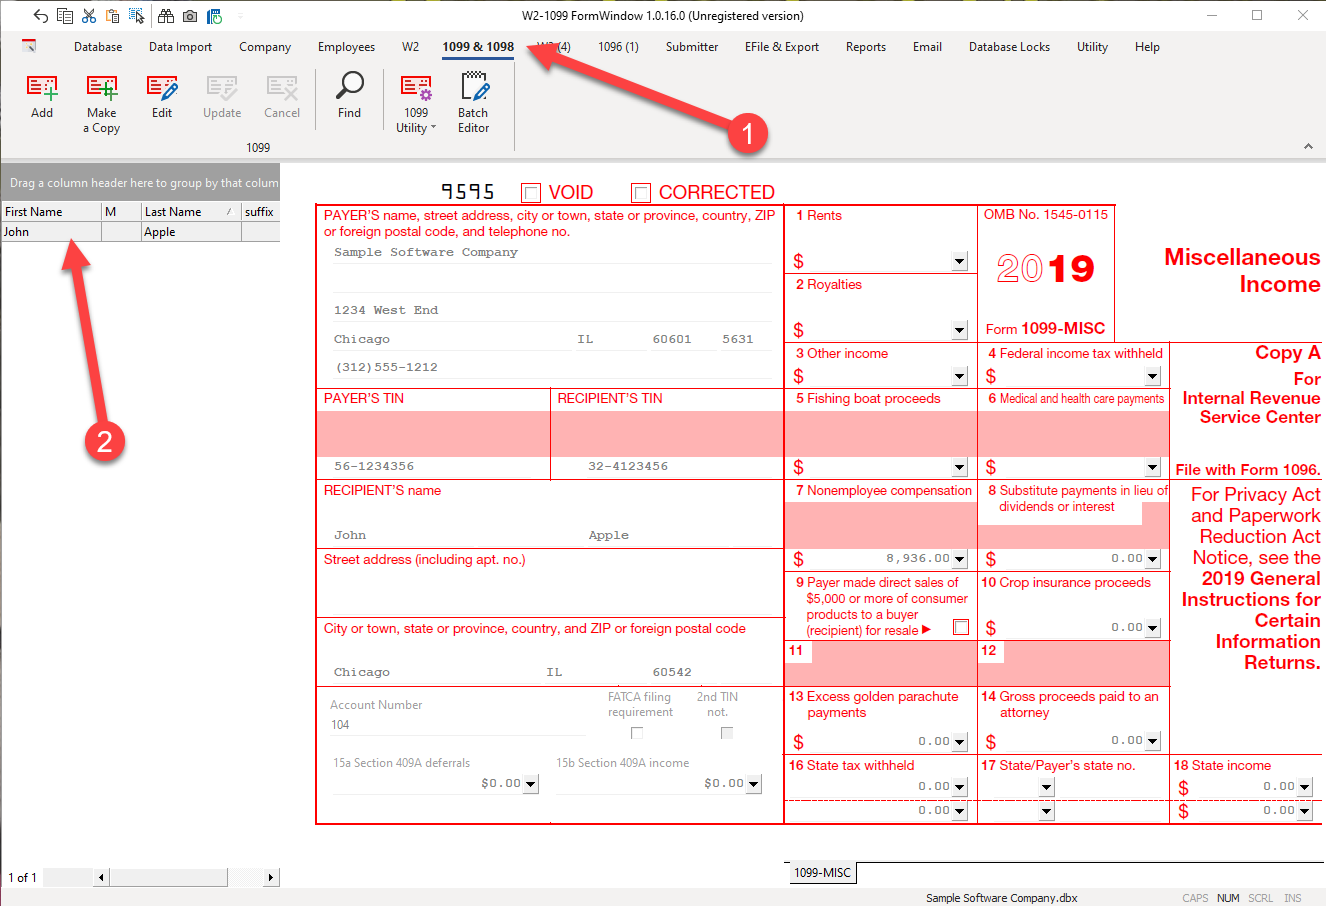
Once the import is done, click on (item 1) 1099 & 1098 and you will see the new payee that was imported (item 2) and if there were more, you would have a list of the payees.